
Fields reference
Every element you can add to a form, what it's for, and what you can configure.
This is a practical reference to the building blocks you place in the builder. Add elements from the block picker — via the + in the layers panel or by dragging onto the canvas — then select one to configure it in the right-hand inspector. The picker groups blocks into Layout, Form Fields, Content, and Actions. (The close button isn't a block — it's part of the form's chrome, configured in the Form settings.)
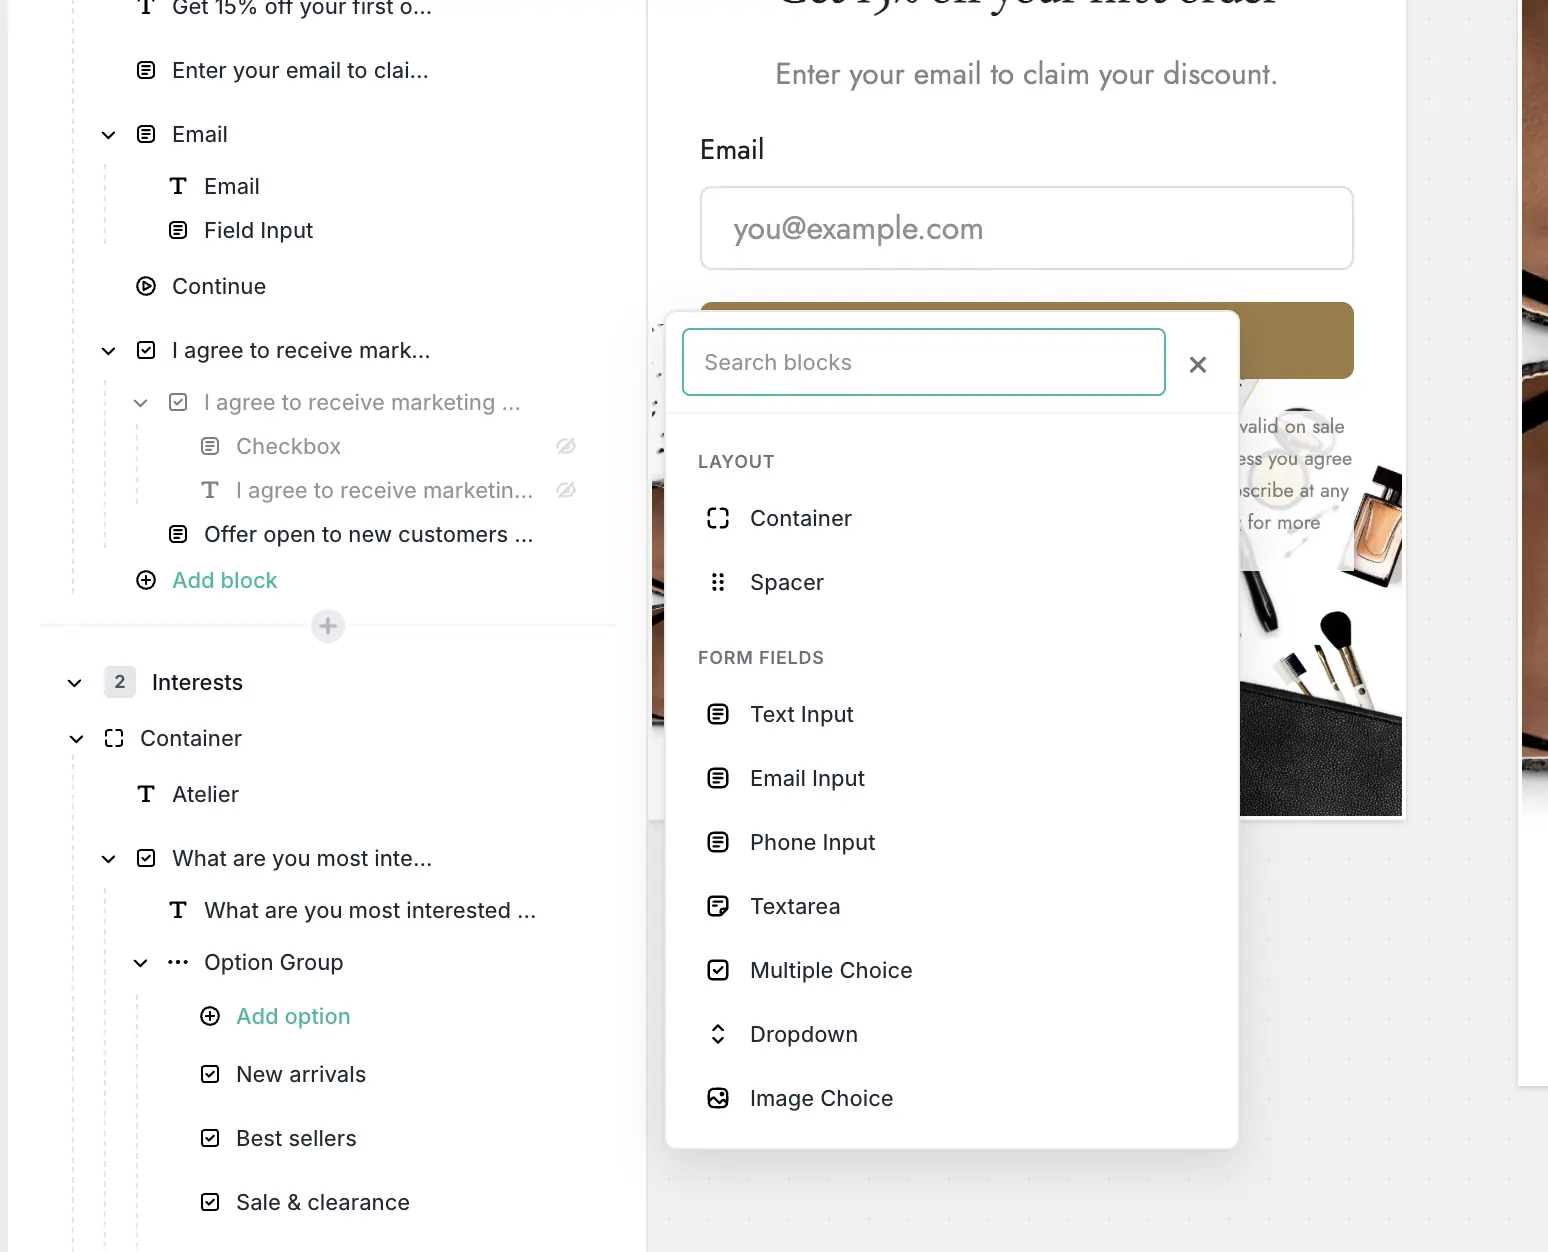
Input fields
| Field | What it's for | What you can set |
|---|---|---|
| Text | Short free-text answers | Placeholder · Allowed answers · Required (+ error) |
| Text area | Longer free-text answers | Placeholder · Rows (1–20) · Required (+ error) |
| Email capture, with built-in email validation | Placeholder · Required (+ error) | |
| Phone | Phone capture with a country dial-code picker | Placeholder · Default country · Required (+ error) |
| Date | A date answer, via a date picker | Required (+ error) |
Every required field blocks the step until it's filled, and shows your error message (or "This field is required" if you leave it blank). Email, phone, and date formats are validated automatically.
A few field-specific details:
- Phone shows a flag-and-dial-code picker in front of the input. Default country (US by default) sets which dial code is pre-selected; when the shopper switches country, and you haven't set your own placeholder, the input shows an example number in that country's local format.
- Date opens the shopper's native date picker — the same control they use everywhere else on their device, so it's familiar on mobile.
- Text area wraps and grows with its Rows setting (3 by default).
- Text can be restricted to a list of Allowed answers — see below.
Allowed answers on a Text field
A Text field can carry a list of Allowed answers. As the shopper types, their browser suggests the matching ones — and the field then only accepts an answer that is on the list. Adding one turns free text into a "pick one of these, but type to find it" control.
Use it when the answer comes from a known set that would be tedious to scroll as a dropdown — countries you ship to, store locations, sizes, a product line. Leave it empty when you genuinely want free text.
To set it up, select the Text field and, under Field Properties → Allowed answers:
- Type a keyword and press Enter to add it. You can paste a comma-separated or one-per-line list (straight out of a spreadsheet) and press Enter to add the whole lot in one go.
- Click into any keyword to rename it, or press Escape to abandon the edit.
- Click the ✕ next to a keyword to remove it. Removing the last one turns the field back into a plain text field.
You can add up to 100 keywords. Matching ignores capitalization and
surrounding spaces, so a shopper who types italy passes — and their answer is
always saved as the Italy you typed, however they submitted it, so all of your
responses group together in reporting and your logic rules can
compare against the keyword exactly. Duplicates are rejected as you add them,
for the same reason.
Because the answers are a known set, they're also reported as a breakdown with counts and revenue in Responses, the same way a dropdown is. The open answers list stays available too, so answers you collected before adding the list are never hidden.
If a shopper submits something that isn't on the list, they see the keywords listed back to them ("Please choose one of: Italy, Spain, France"), or your own text if you fill in Validation message. Long lists fall back to "Please choose one of the suggested options".
Browser suggestion lists are advisory — a shopper can always type past them, and a few browsers style them differently or not at all. That's why Formtoro validates the answer itself, on the shopper's device and again on our servers.
Choice fields
| Field | What it's for |
|---|---|
| Single choice | Pick from a list of options — toggle to multiple in the inspector |
| Dropdown | Pick one from a select menu |
| Image choice | Pick from a grid of image tiles — also toggles single/multiple |
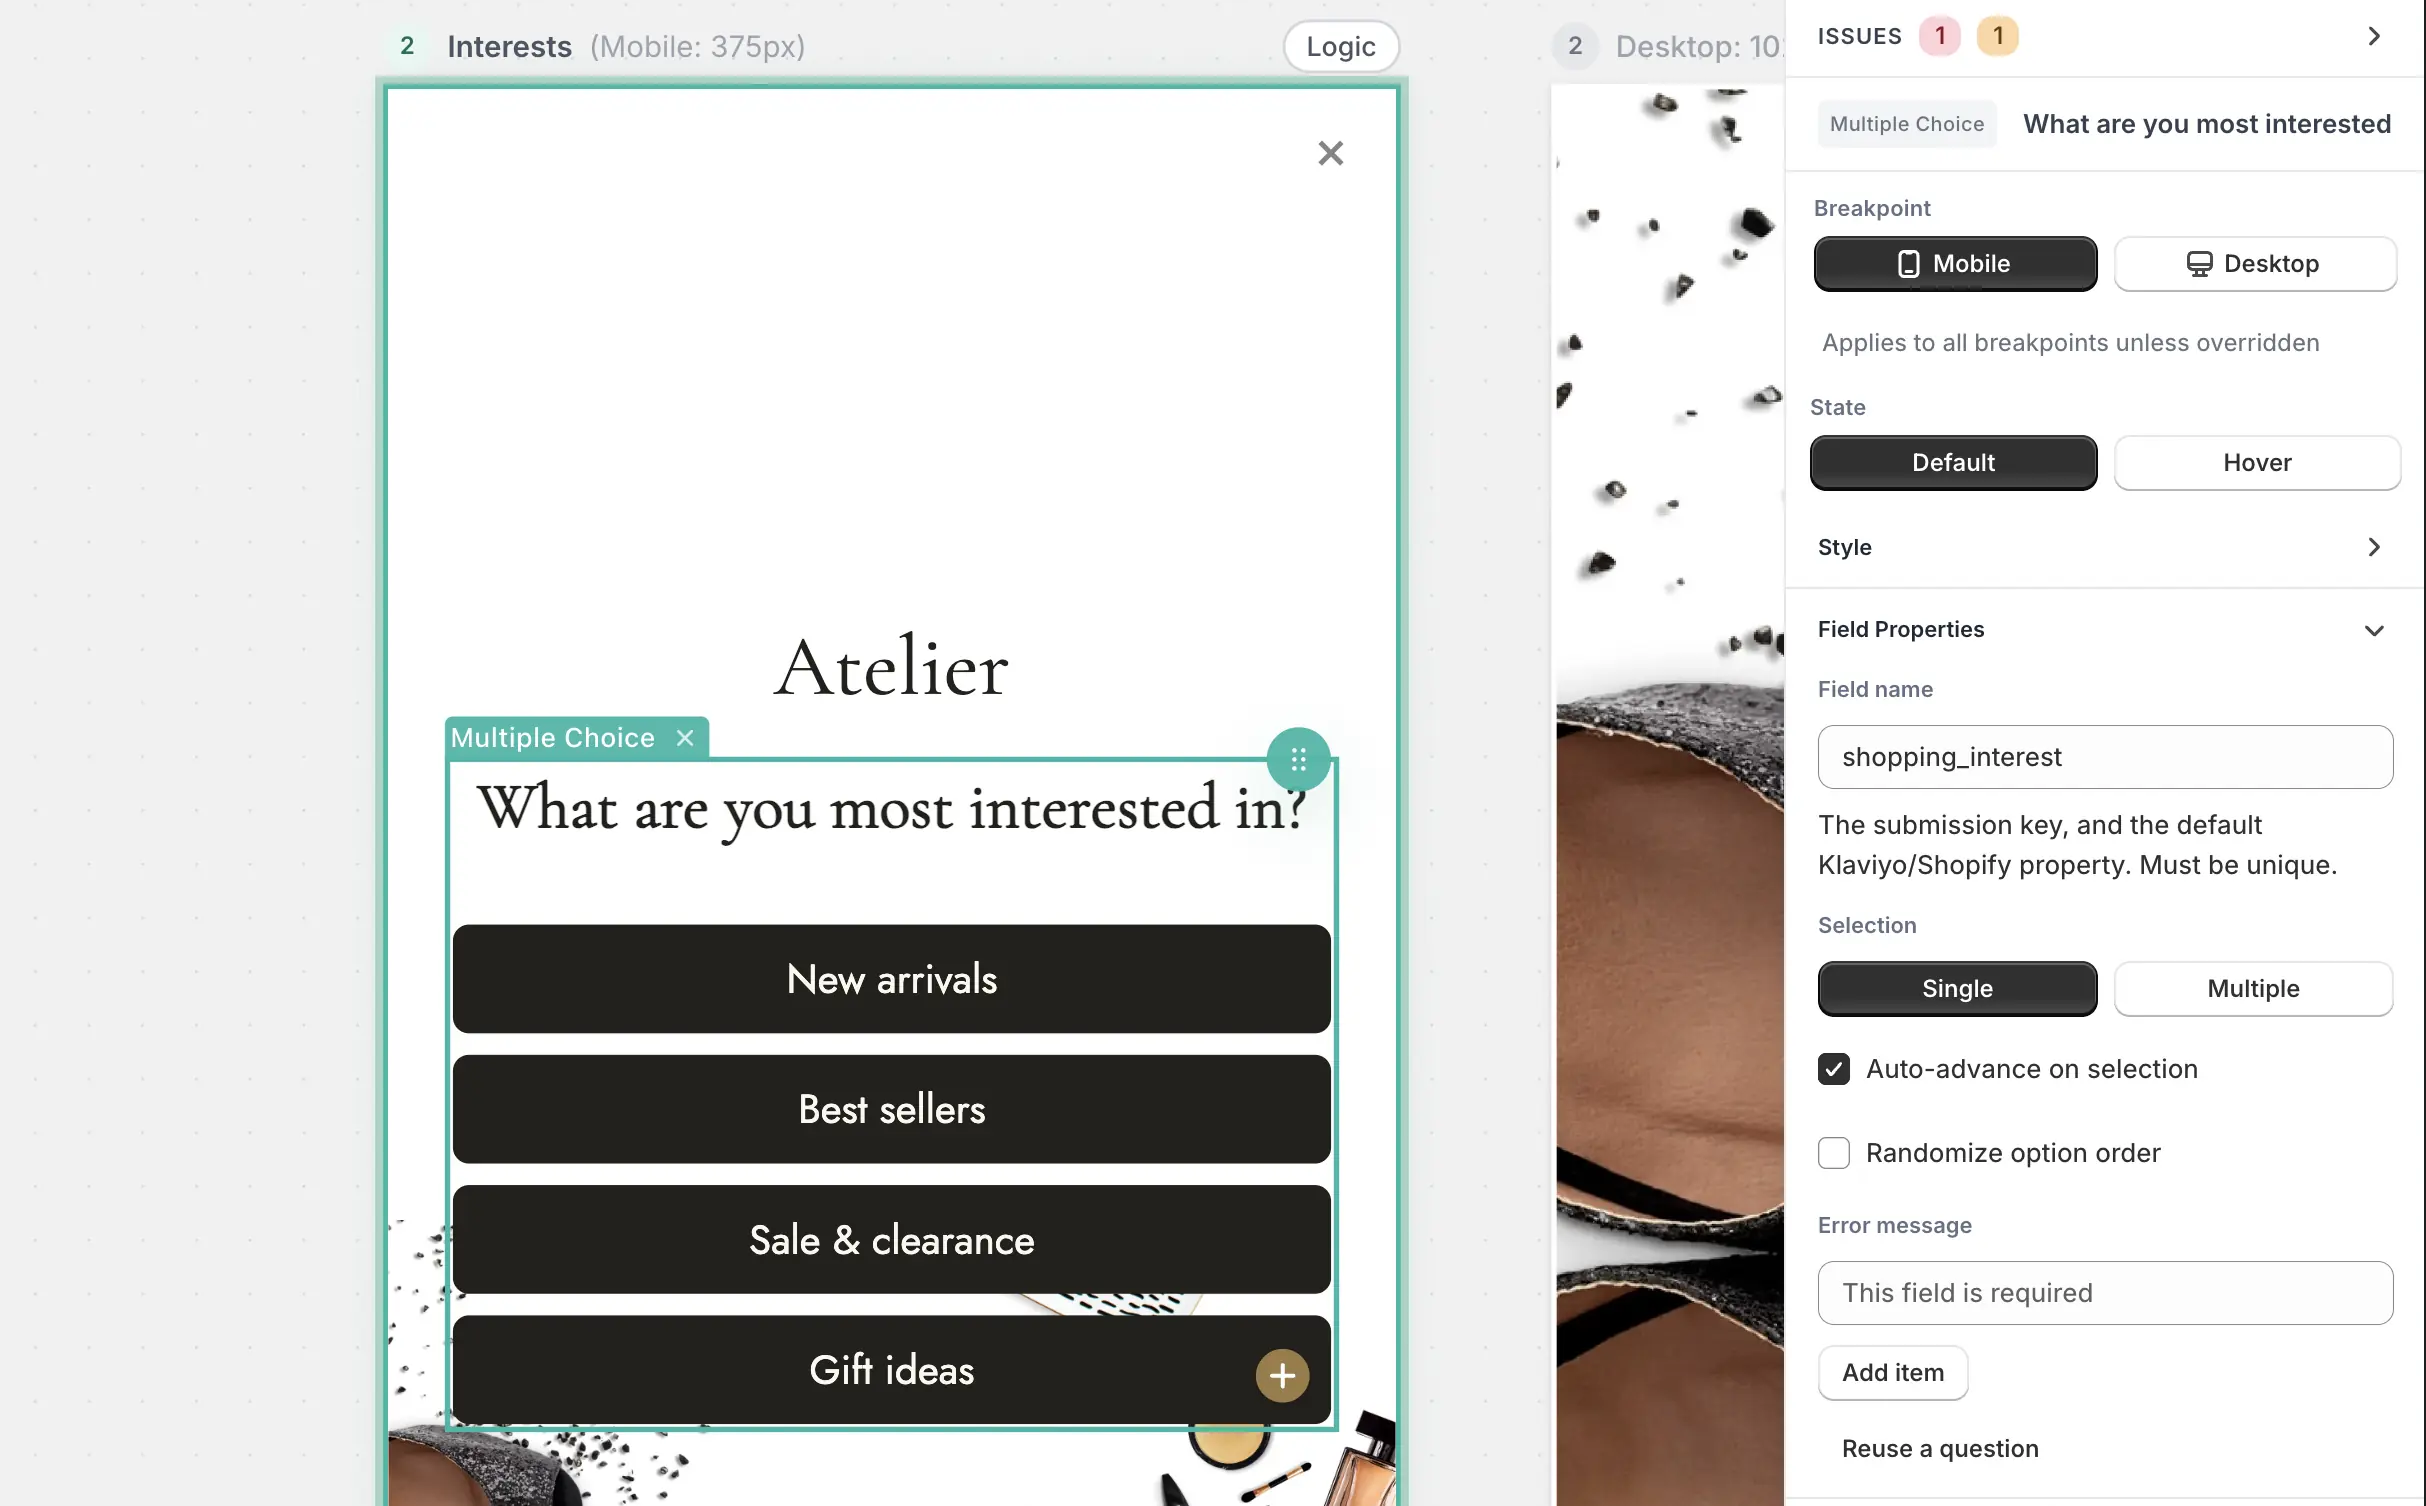
For single-choice and image-choice fields you can configure:
- Selection — toggle between Single and Multiple. Single-select questions are always required (an unanswered single-select is never a valid submission), so the Required toggle is hidden — but you can still customize the error message.
- Auto-advance on selection — for single-select, picking an option moves to the next step automatically (no submit button needed). On by default.
- Randomize option order — shuffles the options per visitor to remove order bias (stable within a visit, reshuffled on the next). Your canvas always shows them in your editing order.
- Layout — arrange options Vertical, Horizontal, or Grid.
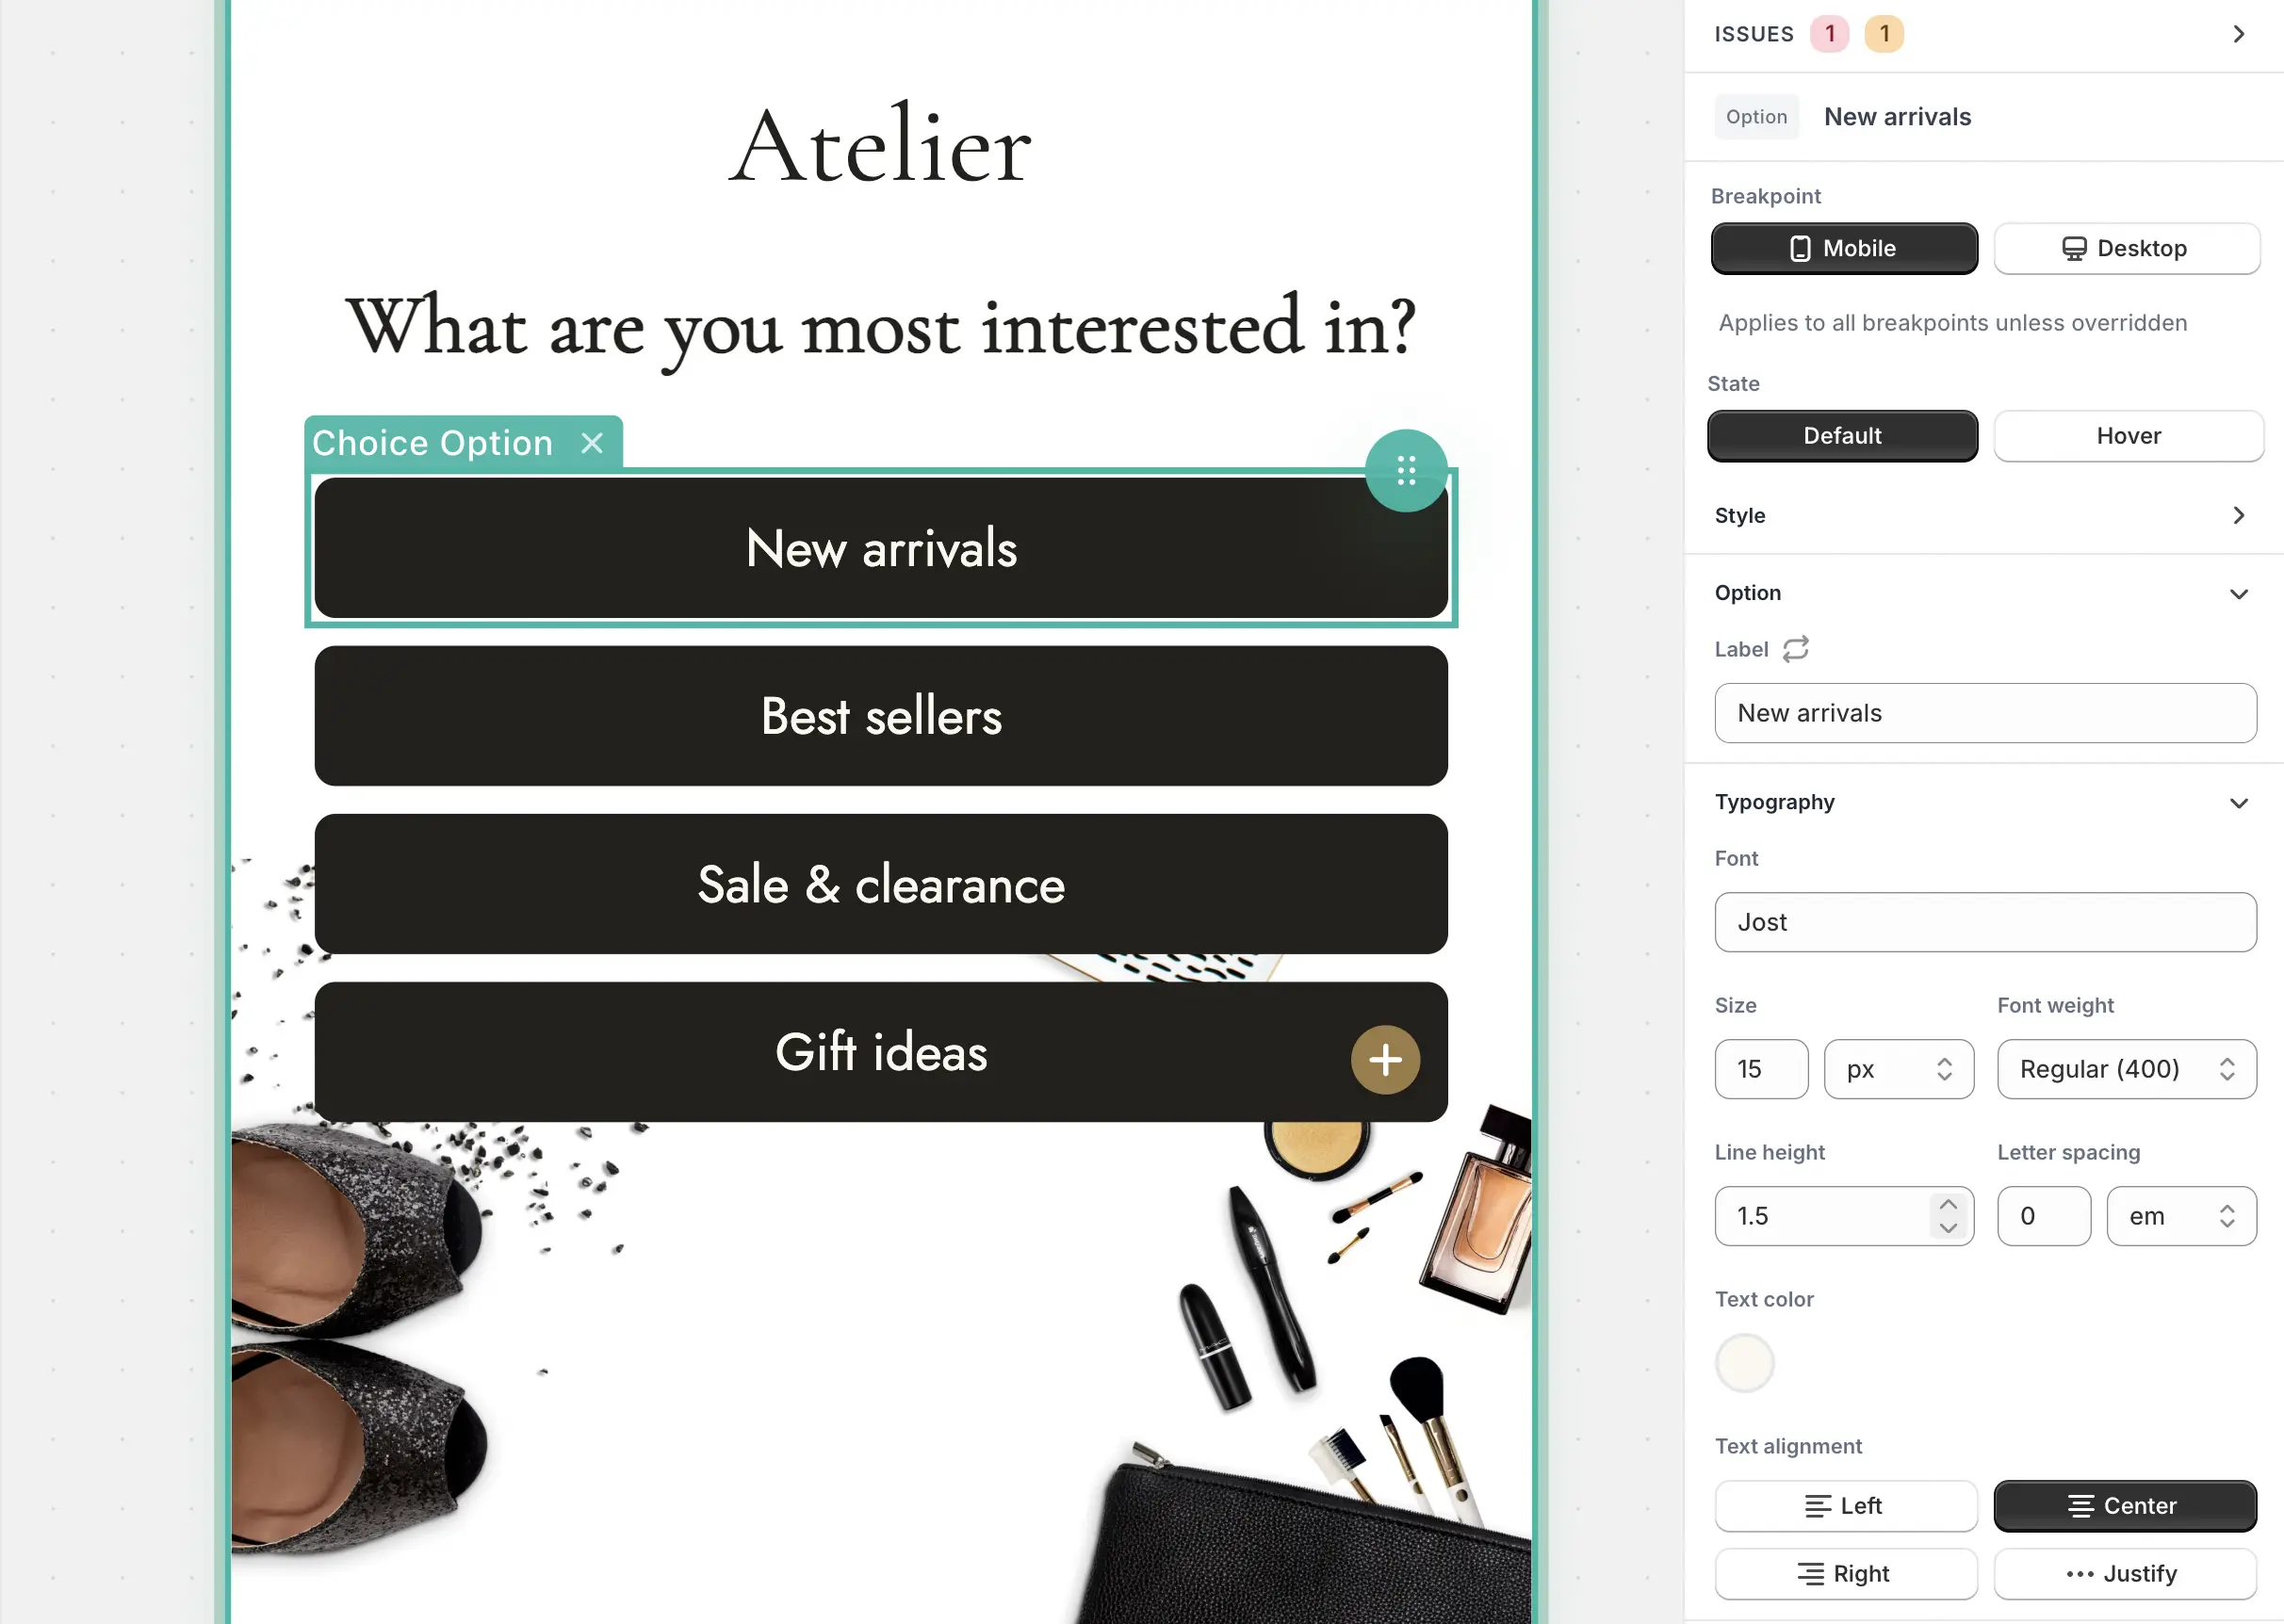
- Add item — add options; edit each option's Label (its stored value is derived from the label automatically).
On an image choice, each tile's picture is a selectable image of its own — click into it to set the source, alt text, and fit with the same controls as a standalone image.
Dropdown is configured slightly differently: edit its Options inline (at least one is required) and set a placeholder.
We can select individual choice items to edit them more granularly:
Consent
The consent field handles marketing opt-in and disclaimers. Pick a Consent mode:
- SMS (the default) — a required checkbox with TCPA-compliant copy. Required is locked on (legally, SMS marketing needs explicit opt-in).
- Email — an informational disclaimer shown with email capture. No checkbox, and it isn't submitted as an answer.
- Custom — you control the copy, the checkbox, and whether it's required.
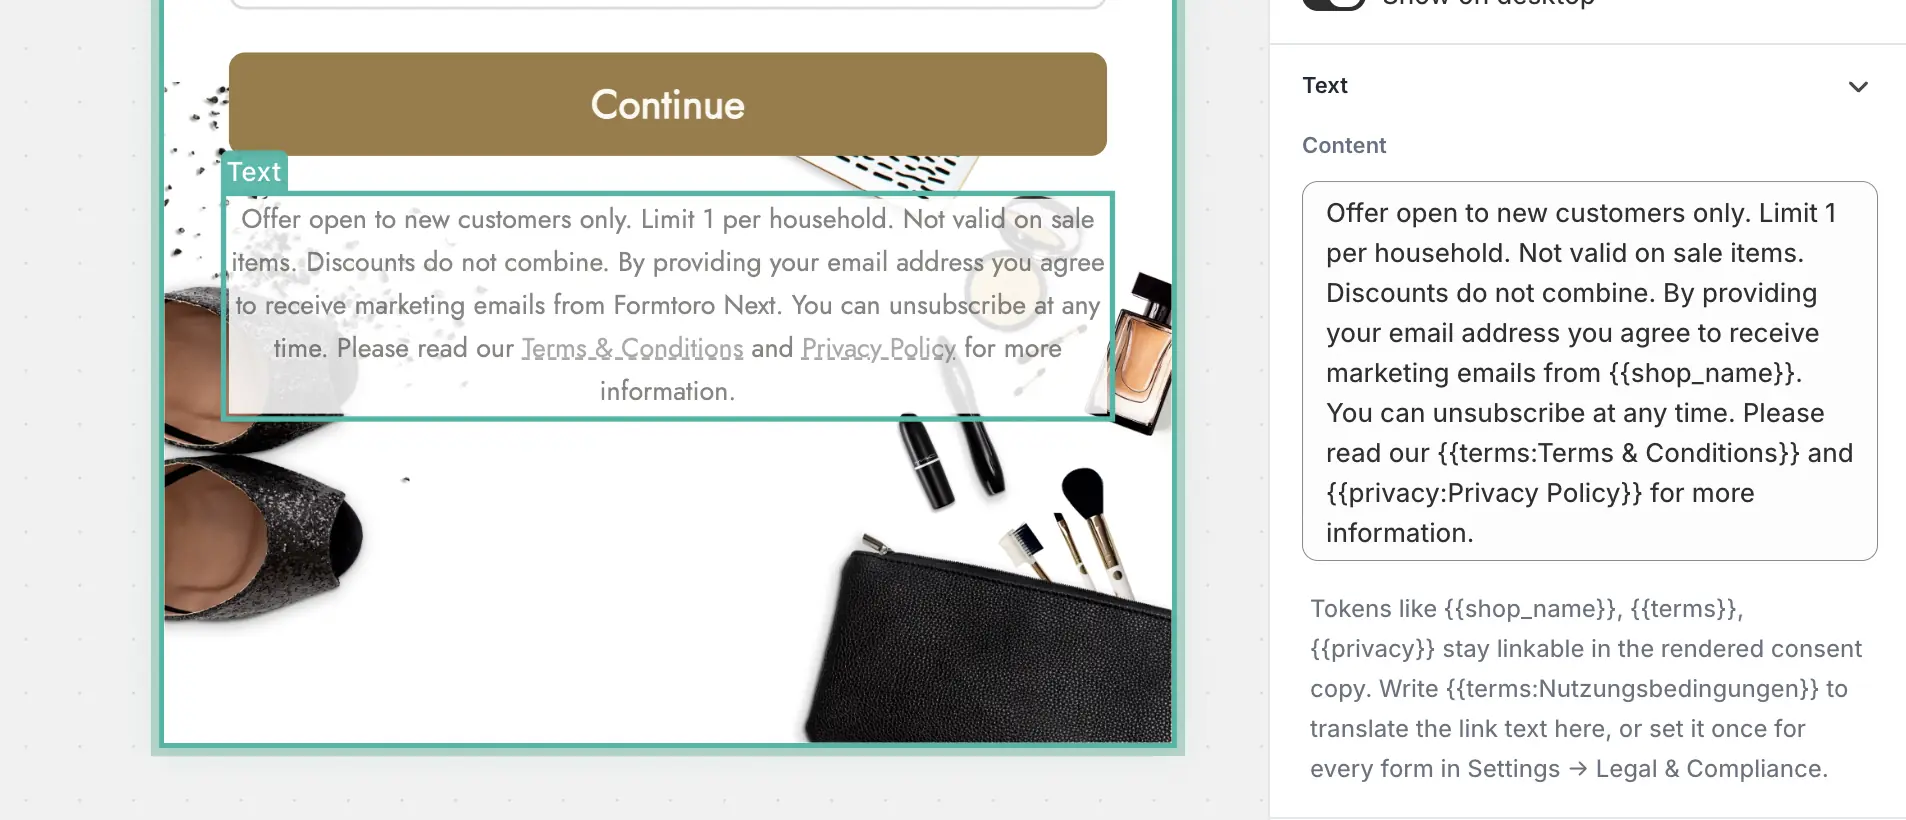
Consent copy supports {{shop_name}}, {{terms}}, and {{privacy}}, which
resolve to your store name and your policy links on the live form. Set the
policy links in Settings → Legal & compliance,
and republish
after changing them.
Changing the wording
There are two places to edit consent copy, and which one you want depends on how far the change should reach:
- Every form — Settings → Legal & compliance. Your copy there becomes the starting text for every consent field you add from then on. A Use recommended button appears whenever your copy differs from ours, so you can always snap back.
- This form only — select the consent text on the canvas and edit the
Content box in the inspector. It's a plain-text box that understands the
same
{{...}}placeholders, so the links keep working while you rewrite the words around them.
Editing the Content box changes only the form you're in. It does not affect your saved default in Settings, and it does not change consent fields on your other forms.
Translating consent copy
Consent copy is the one place where a non-English store has to translate two separate things — the sentence, and the clickable link words inside it.
- The link words. Set Terms link text and Privacy link text in
Settings → Legal & compliance.
{{terms}}and{{privacy}}then render in your language on every form —Nutzungsbedingungeninstead of "Terms & Conditions". Set it once; existing forms pick it up the next time you save a version. - The sentence. Rewrite it in your own language, in either of the two places described under Changing the wording.
If one form needs different link wording than the rest of your store, put it inside the placeholder instead:
Weitere Informationen finden Sie in unserer {{privacy:Datenschutzrichtlinie}}.The Content box goes read-only for rich copy. If your consent text contains bold or colored text, a link you made by hand, or a merge tag other than
{{shop_name}}, plain text can't represent it — so rather than risk destroying it, Formtoro locks the box (you can still read the copy). Edit that consent text directly on the canvas instead.
The checkbox itself has two dedicated color pickers in the inspector: Background color paints the unchecked box, Accent color fills it when checked.
Content
| Element | What it's for | Notes |
|---|---|---|
| Heading | A title (renders as H1–H4) | Edit text inline on the canvas; supports merge tags |
| Text block | Paragraph copy | Inline rich text; supports merge tags and policy links |
| Image | A picture, optionally linked | Source, alt text, fit, position, link, per-breakpoint image |
Merge tags personalize copy at render time: type {{ while editing a
heading or text block to insert First Name, Discount Code, Shop
Name, Product Name, Product Price, or Cart Total.
Image controls live in the inspector's Asset section: pick or upload a source, set alt text, choose a fit (Cover — the default, fills and crops like a photo — Contain, Fill, None, or Scale down), and set a focal position for cropped fits. You can give mobile and desktop different images: the source you pick while editing the Desktop breakpoint becomes a desktop override, while the base image serves smaller screens. Add a link URL to make the image clickable.
Layout
| Element | What it's for |
|---|---|
| Container | Group elements to arrange them (row / stack / grid) and to enable floating |
| Spacer | Add vertical space between elements |
See Layout & responsive design for how containers unlock side-by-side and responsive layouts.
Actions & special
- Submit button — set its Text and Loading text, and choose what happens On submit: go to the Next step, Skip step (advances without enforcing required fields — perfect for a "Skip for now" button), Close form, or Redirect to URL. Step routing rules still take priority over the button's own action.
- Discount display — shows a static discount code inside the form. The Static code customers will see field suggests your store's active Shopify codes as you type, and warns you if the code you enter isn't an active discount in Shopify. Double-click the element on the canvas to jump to the field. Shoppers don't have to copy it — the code auto-applies to their cart as soon as they subscribe — but they still can (hide the copy button if you just want to show the code). Magic discounts don't need this element — they apply automatically at checkout.
- Add to cart — a button that adds one product to the shopper's cart when they click it, for a free gift with purchase. Pick the product with Select product, and change the Button text, Adding text, Added text, and Unavailable text. The button stays hidden on your store until a product is selected.
Good to know
- Field names are automatic. Each answer is stored under a key (like
emailorshopping_interest) that Formtoro assigns; it's also the default Klaviyo/Shopify property name. You can edit it in the inspector's Field name box — it must be unique within the form, and any logic rules referencing it update automatically. Those keys are what you'll see in Submissions and the Responses view. - Reuse a question across forms. Choice and dropdown fields offer a Reuse question picker that adopts another form's question key and answer set — responses from both forms then combine in shop-wide analytics instead of splitting into two look-alike questions.
- Every field can hide its label. Toggle Show label in the inspector (or the eye icon in the layers panel). A field hidden entirely can't be required — hiding it un-requires it.
- A few controls aren't exposed yet. Minimum/maximum selections on choice fields, minimum/maximum dates, and the heading's level (new headings render as H2) exist in the data model but don't have builder controls today — treat them as planned, not hidden.
What a form can't collect
Formtoro forms collect typed answers and choices — text, email, phone, long text, dates, and the choice/dropdown families above. There is no file upload or image upload field, so a shopper can't attach a photo, a receipt, or a document to a submission — not as a guest, and not as a logged-in customer.
Images in a form are always yours, never the shopper's. They arrive three ways:
- an image block in the Content group — a picture you place in the layout,
- image choice options — a choice field whose answers are pictures the shopper picks between, and
- a background image on the form or a step, set in the inspector.
If you genuinely need a file from a shopper, use Submit → redirect to send them to a page on your store that accepts one after they subscribe — the submission still lands in Formtoro, and the upload happens where you already handle it.
Next steps
- Building forms — placing and arranging these elements.
- Logic engine — branch between steps and route shoppers based on their answers.