
Getting started
Install Formtoro, work through the setup guide, and get your first form live.
This guide takes you from installing Formtoro to a live form on your storefront — about five to ten minutes, most of it spent admiring what Luigi built for you.
1. Install the app
Install Formtoro from the Shopify App Store. After you authorize it, Formtoro provisions your workspace automatically — there's nothing extra to set up.
2. Work through the setup guide
The first time you open Formtoro, the Home page shows Finish setting up Formtoro — a checklist of everything between you and a live form.
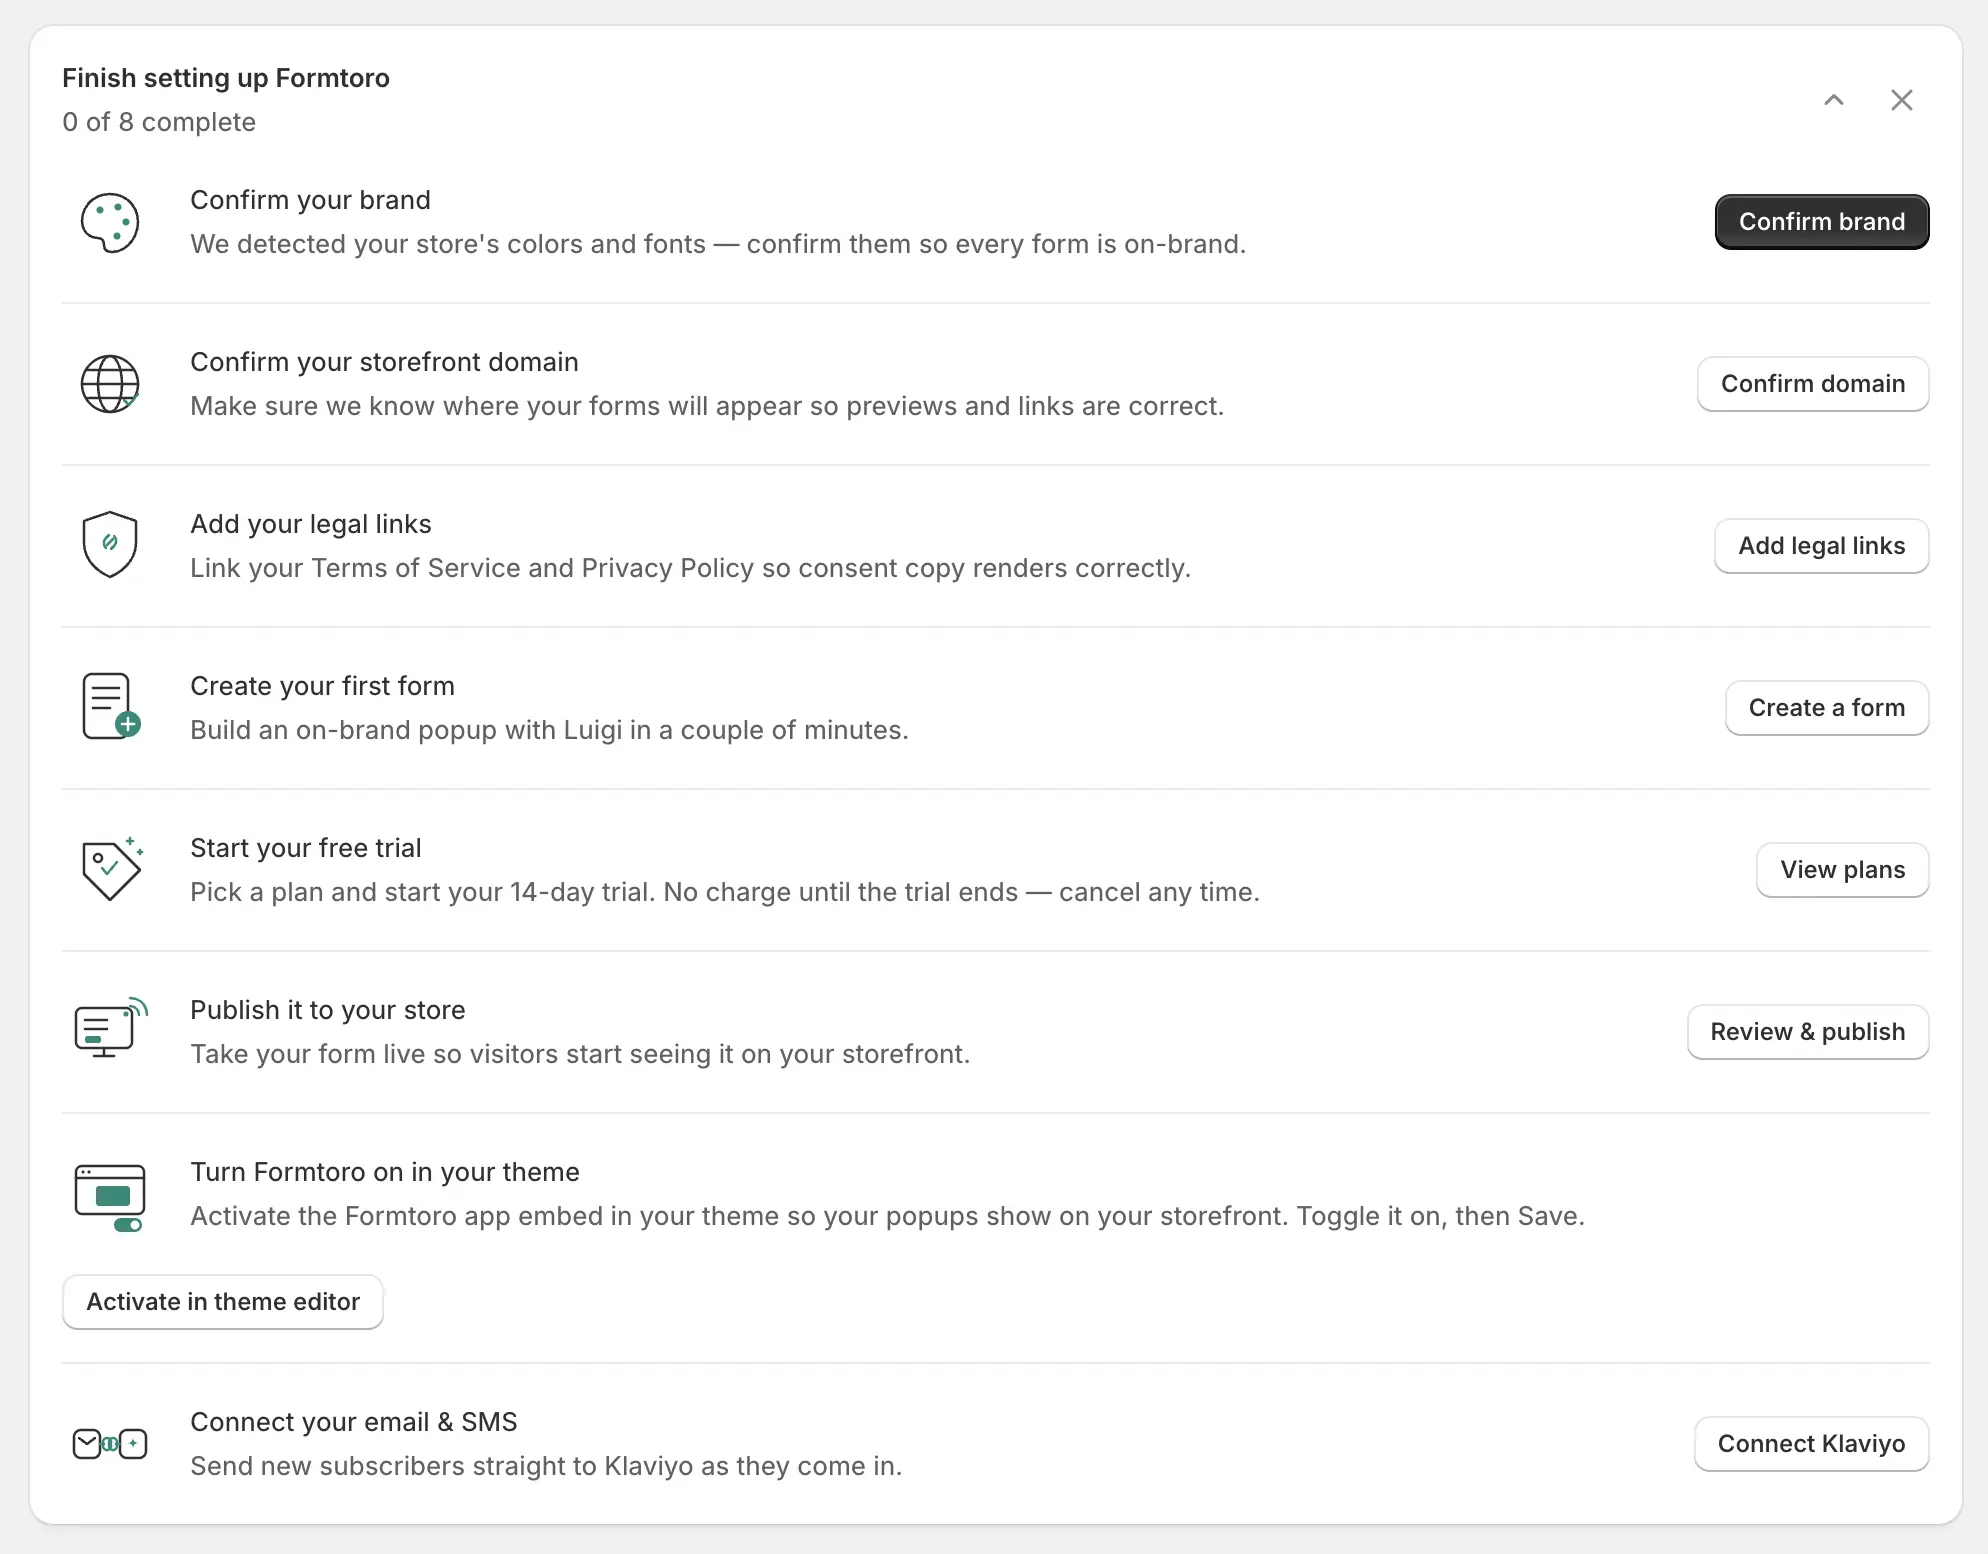
- Confirm your brand — Formtoro detects your colors and fonts from your Shopify theme; confirm or refine them.
- Confirm your storefront domain — so previews and links point at the right store.
- Add your legal links — your Terms of Service and Privacy Policy URLs, pre-filled from your Shopify policies. Consent copy links to these, so it's best done before you publish.
- Create your first form — the wizard below.
- Start your free trial (optional) — the free plan already publishes; the 14-day trial unlocks Formtoro's full power and doesn't charge until it ends.
- Publish it to your store — save a version and turn the form on.
- Turn Formtoro on in your theme — the one-time app embed toggle.
- Connect your email & SMS — wire subscribers into Klaviyo. This one doesn't block going live: Formtoro captures every lead durably either way.
Each step's button takes you straight to the right place. The rest of this guide walks the three that matter most: create, publish, connect.
Confirm your brand
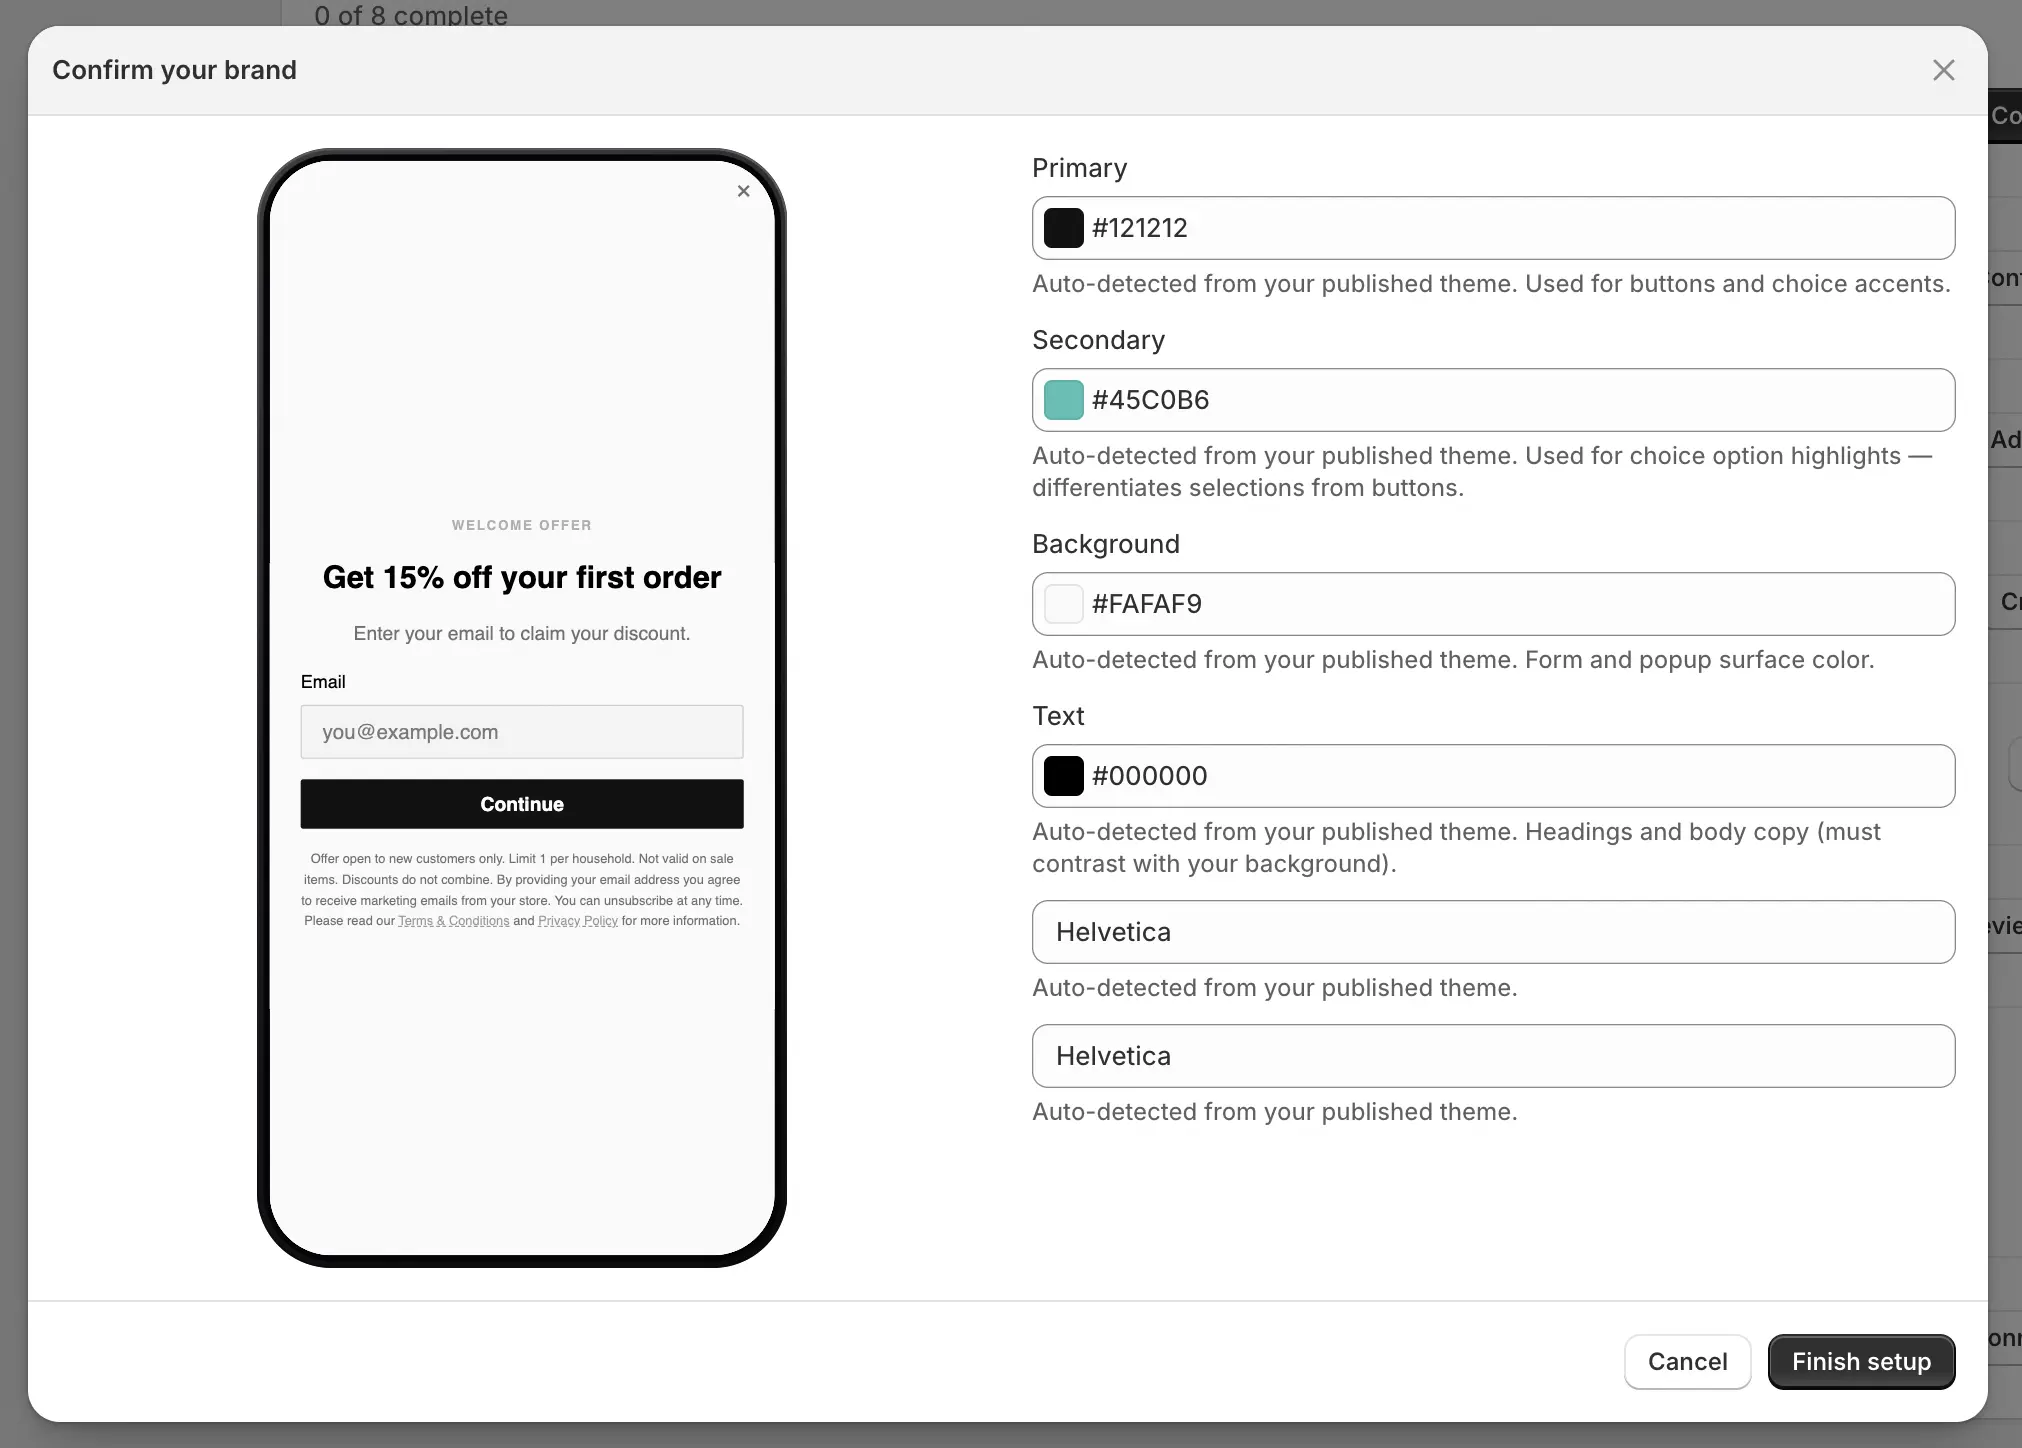
The moment you install, Formtoro reads your Shopify theme and pulls in your colors and fonts, so your first form already looks like your store rather than a generic template.
The setup guide asks you to confirm what it detected — nudge a color, swap a font, and you're done.
This is worth a minute up front: every preview that follows (the design gallery, the color step, Luigi's draft) renders in these brand settings, so getting them right here means everything downstream looks finished from the first glance.
Nothing's locked in — you can refine your palette, fonts, and full themes any time in Themes & styles.
Confirm domain
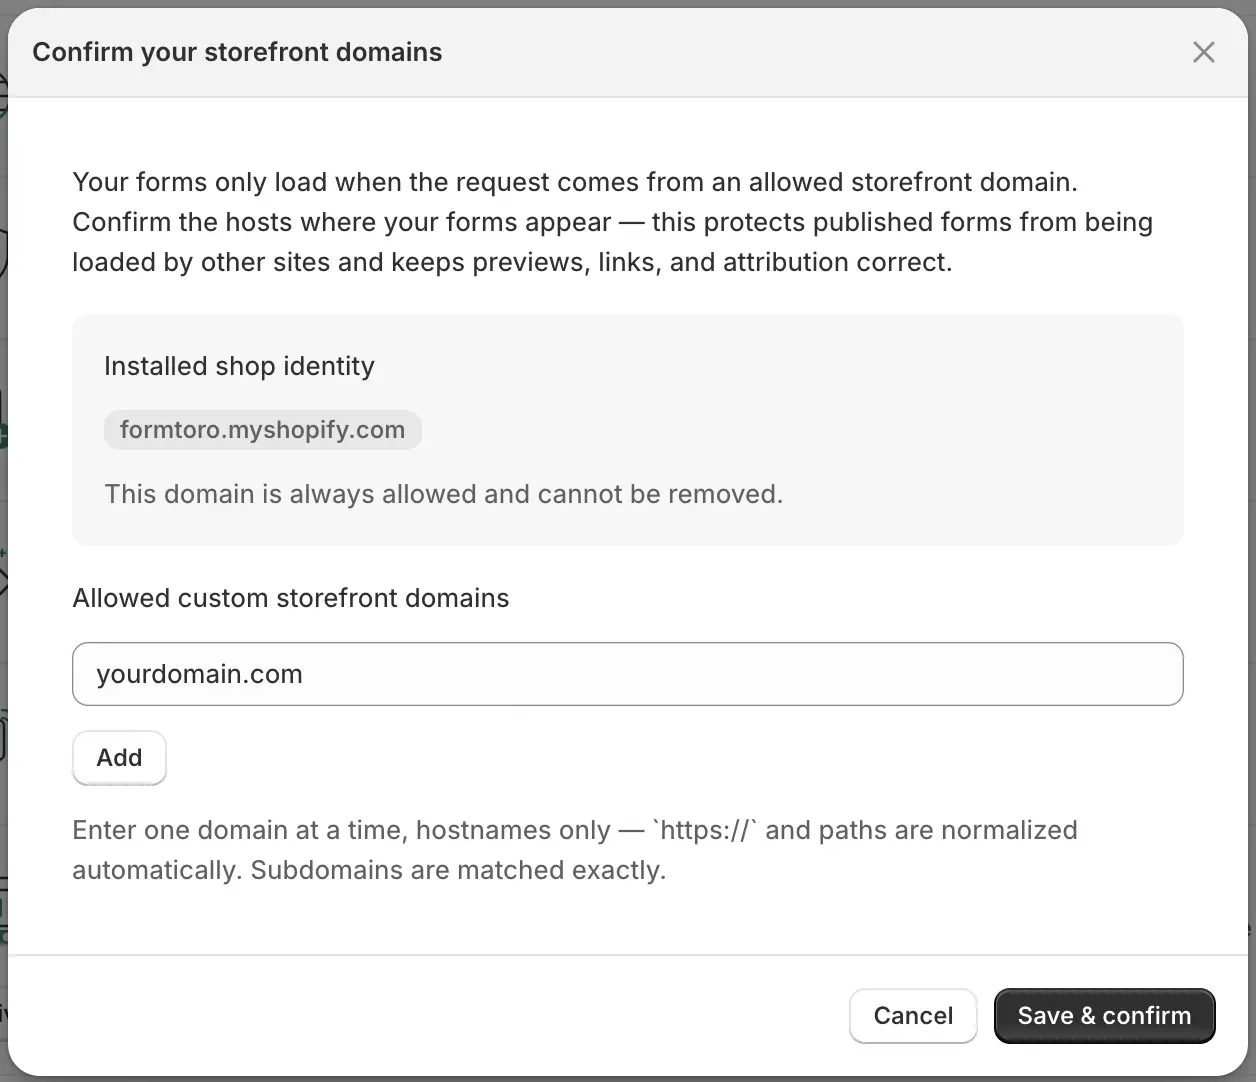
Formtoro needs to know which host your storefront serves from, and it matters for two reasons.
First, previews and the links in the setup guide point at the right store instead of a stale URL.
Second — the one that counts at launch — live forms only load when the request comes from an allowed storefront domain, which is what stops another site from loading your forms just by knowing a form ID.
Your installed Shopify shop domain is always allowed and can't be removed, so if you sell from myshop.myshopify.com there's nothing to do here.
If you sell from a custom domain, add it: paste anything — https://Shop.Brand.com normalizes to shop.brand.com automatically — and remember that subdomains match exactly, so www.brand.com and shop.brand.com are separate entries.
Until your live host is on the list, forms load only from the Shopify preview domain and Formtoro shows a warning. You can manage the list any time under Settings → Storefront domains.
Add your legal links
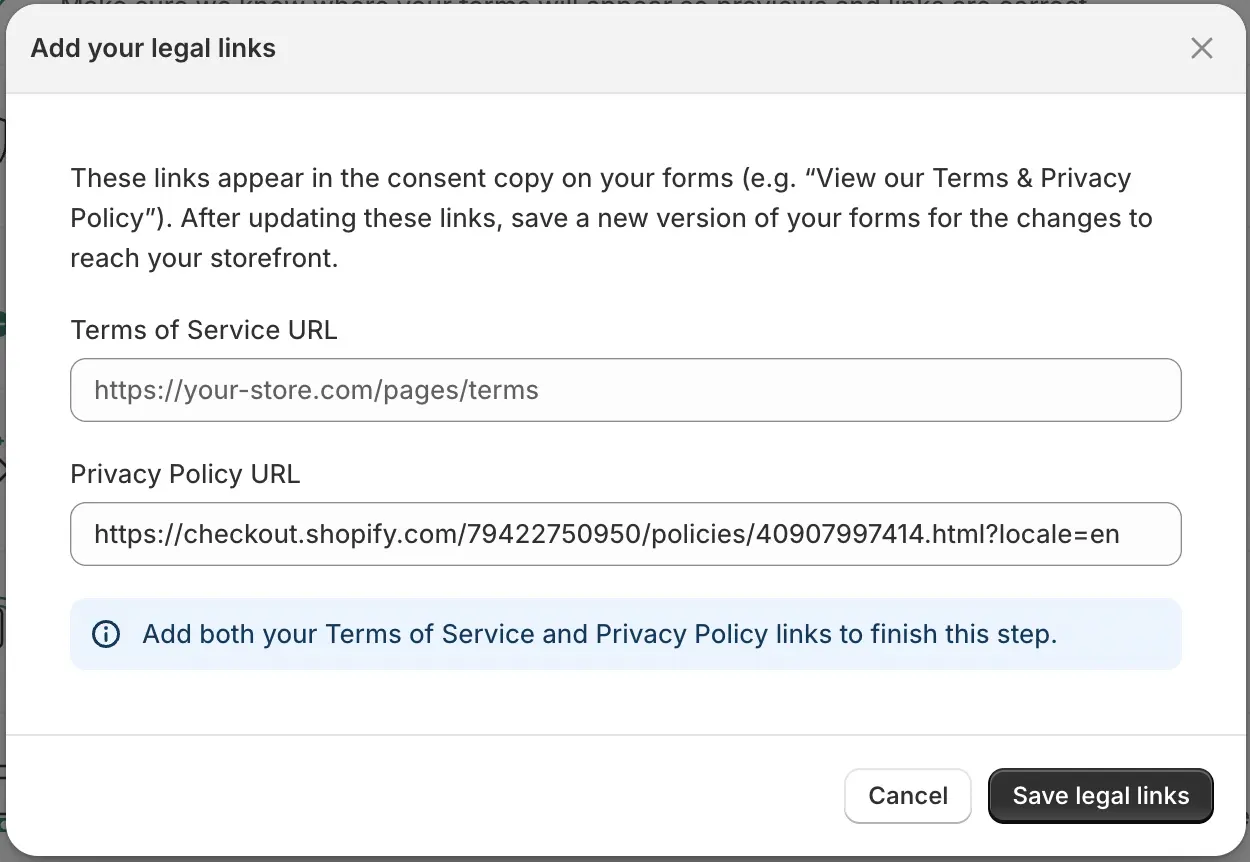
Your consent fields link out to your Terms of Service and Privacy Policy, so shoppers can read exactly what they're agreeing to.
Formtoro pre-fills both URLs from your Shopify store policies, so most of the time you're just confirming what's already there.
Do this before you publish. Policy links are baked into a form the moment you save a version, so a form published without them ships with no clickable policy links — and Formtoro shows a warning banner while either URL is missing.
You can edit the URLs and the consent copy any time in Settings → Legal & compliance.
Start your free trial
This step is optional. The free plan already lets you build, publish, and go live — you don't need to start a trial to get your first form on the storefront.
We suggest the 14-day free trial so you can experience the full power of Formtoro — higher limits and the AI features that make Luigi shine. It doesn't charge until the trial ends, and billing runs entirely through Shopify, so there's no separate card to enter.
Start it from the setup guide, pick a plan on Shopify's hosted page, and you land right back in Formtoro. You can change or cancel any time from Settings → Plan & usage.
3. Create your first form
From Forms, click Create form. A short wizard walks you through the choices, previewing each one with your real brand:
- Choose a format — name the form and pick its capture shape: Email first, Micro-opt-in (Yes / No), or Question, then email. Tick Collect phone numbers to add a phone step after the email step.
- Pick a design — a gallery of form designs, each previewed in your brand palette.
- Pick a color — swap the palette for the design you chose: built-in Light and Dark, plus your brand themes.
- Choose a display type — Popup, Full Page, or Slide-in (Inline joins the list once you've made your first form). Whichever you pick, phones default to a Full Page takeover — see Display modes & triggers.
- Choose a layout — where the hero image sits, if the design has one.
- Add a discount (optional) — an existing Shopify code, or a magic discount that applies itself at checkout.
- Let Luigi write it — Luigi drafts the headline, questions, and button copy from your store; add a short steer if you like ("skincare quiz, friendly tone"). Your first form's generation is free. On later forms this step is optional — Skip & use template creates the form with the design's default copy.
Click Create form, watch Luigi write, and you land in the builder with a finished draft.
4. Make it yours
Edit anything in the builder — text is edited in place, right on the canvas. Or, if you are on a paid plan, just ask our AI, Luigi: "Add a 'How did you hear about us?' question" or "Make the heading match my brand."
5. Save it and turn it on
Press Save version — Formtoro then asks whether to turn the form on. (Once a form is on, later saves update the storefront immediately, and Turn on / Turn off flips it live or off any time.) Two things to line up the first time:
- Turn Formtoro on in your theme — popups are delivered by a theme app embed that Shopify keeps off until you enable it. Click Activate in theme editor from the setup guide, toggle Formtoro Popups on, and Save.
- Allow your custom domain — if you sell from one, add it under Settings → Storefront domains.
The Going live guide covers both in two minutes — and exactly what to check if a form doesn't appear.
6. Connect Klaviyo
Connect Klaviyo in Settings → Integrations and every submission syncs to your lists and profiles in real time — email and phone with per-channel consent, plus each answer as a profile property. See Klaviyo for the two ways to connect.
Once you're live, results appear in Analytics as shoppers respond.
Next steps
- Building forms — go deeper on steps and fields.
- Going live — get your form rendering on the storefront.
- Connect Klaviyo — sync subscribers as they come in.